UDISE Plus Individual Student Import 2026-27: Step-by-Step Guide with Screenshots
📋 Table of Contents (click to collapse)
- Introduction to Individual Student Import in UDISE Plus
- Prerequisites for Importing Students (PEN & DOB)
- Step 1: Navigating to the UDISE Plus Portal
- Step 2: Selecting Student Module and State Login
- Step 3: Accessing the Academic Session 2026-27
- Step 4: Locating the Progression and Import Module
- Step 5: Launching the Import Module (Within State)
- Step 6: Accessing the Search by PEN Utility (Aadhaar & YOB)
- Step 7: Entering Student PEN and Date of Birth
- Step 8: Verifying Student Dropbox Status (Active for Import)
- Step 9: Entering Import Admission Details (Class, Section, Date)
- Step 10: Confirming and Executing the Student Import
- Troubleshooting Session Mismatch Errors & Inactive Dropbox Status
- Summary Checklist for School Administrators
- Frequently Asked Questions (FAQs)
Introduction to Individual Student Import in UDISE Plus
In the Unified District Information System for Education Plus (UDISE+) Student Module, school administrators must manage student enrollment and mobility accurately. When a student transfers from another school and takes admission in your school for the academic year 2026-27, you must officially pull their digital record from the previous school's database. This process is called Student Import. Re-registering the student as a fresh admission is strictly prohibited as it generates a duplicate Permanent Education Number (PEN) and corrupts national database tracking.
Instead of manually re-entering all demographic details, the portal allows you to search, locate, and claim existing student profiles from other schools. This tutorial details the step-by-step workflow to execute an individual student import for the 2026-27 session. We cover how to navigate the portal, retrieve missing PENs, handle out-of-state constraints, verify Dropbox status, and resolve common system errors like session mismatches.
Prerequisites for Importing Students (PEN & DOB)
To successfully import a student, the portal requires two primary identifiers:
- Permanent Education Number (PEN): A unique 11-digit national identity number allocated to every student registered in the UDISE+ database.
- Date of Birth (DOB): The student's birth date, which must match the record registered on the UDISE portal (note that this may sometimes differ from the Aadhaar card if the previous school entered it incorrectly).
If you do not have these details, you must retrieve them using the portal's search tools before proceeding. Let's look at the step-by-step process with clean screenshots.
Step 1: Navigating to the UDISE Plus Portal
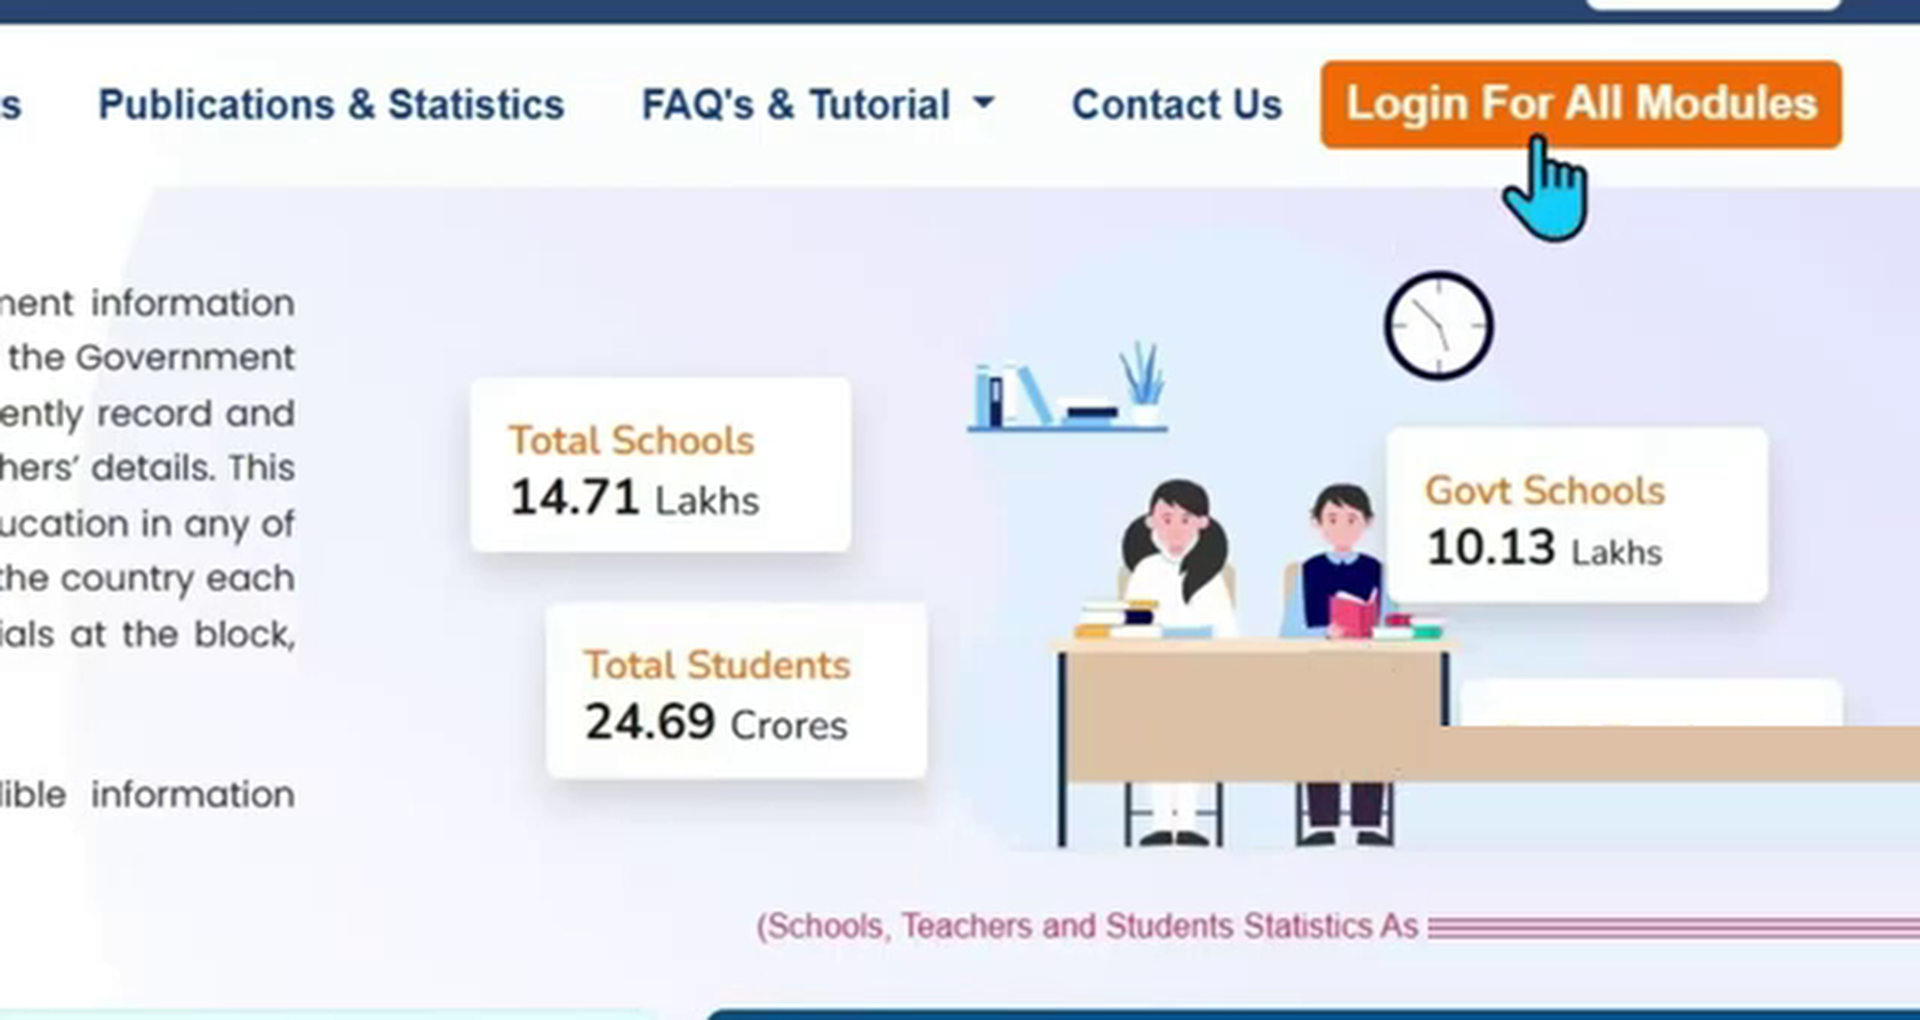
Open your browser and navigate to the official national education portal homepage: udiseplus.gov.in. Locate the main login panel on the homepage. Click the blue button labeled "Login For All Modules" to access the central login gateway.
Step 2: Selecting Student Module and State Login
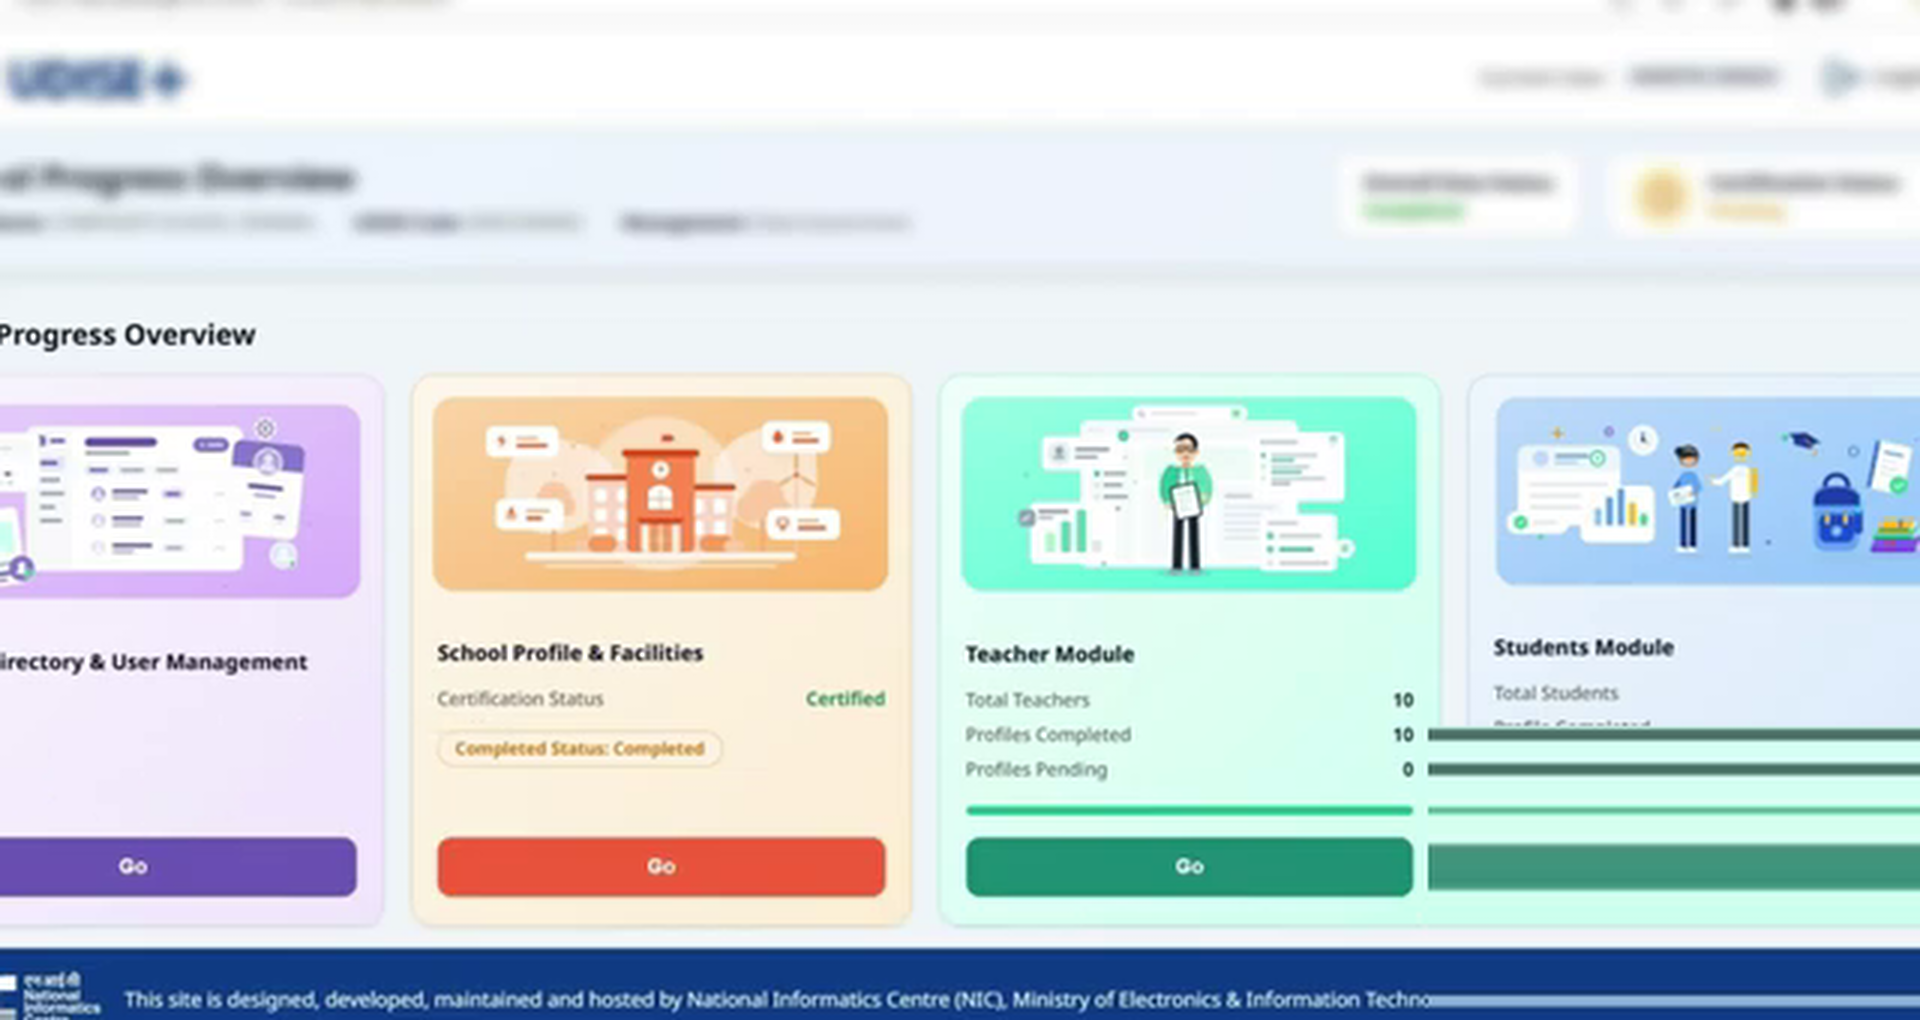
On the module select dashboard, scroll down to the "Student Module" section. Select your school's state from the dropdown menu and click the adjacent "Go" button. This routes you to the dedicated Student Database Management System (SDMS) login screen for your region.
Step 3: Accessing the Academic Session 2026-27
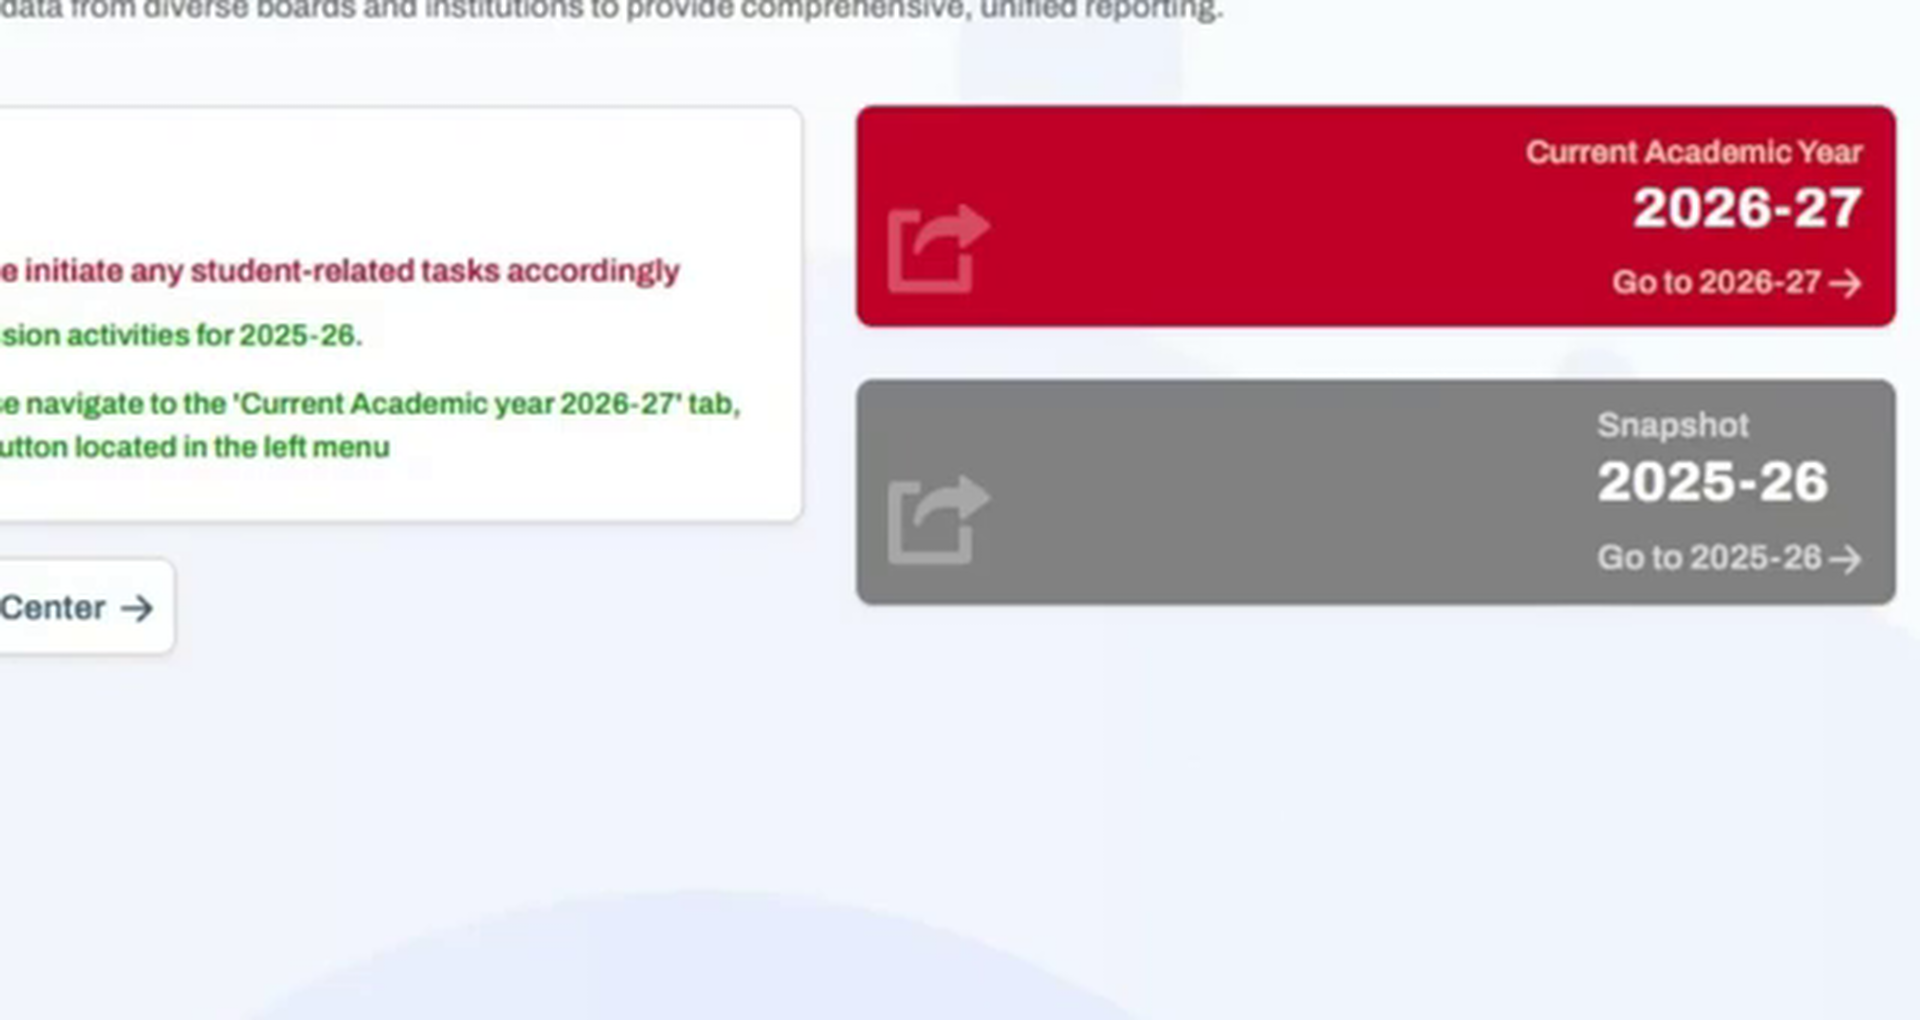
On the landing screen of the school database dashboard, select the panel card for "Academic Year 2026-27". This opens the active database editor for the current school term, allowing you to execute promotions and imports.
Step 4: Locating the Progression and Import Module
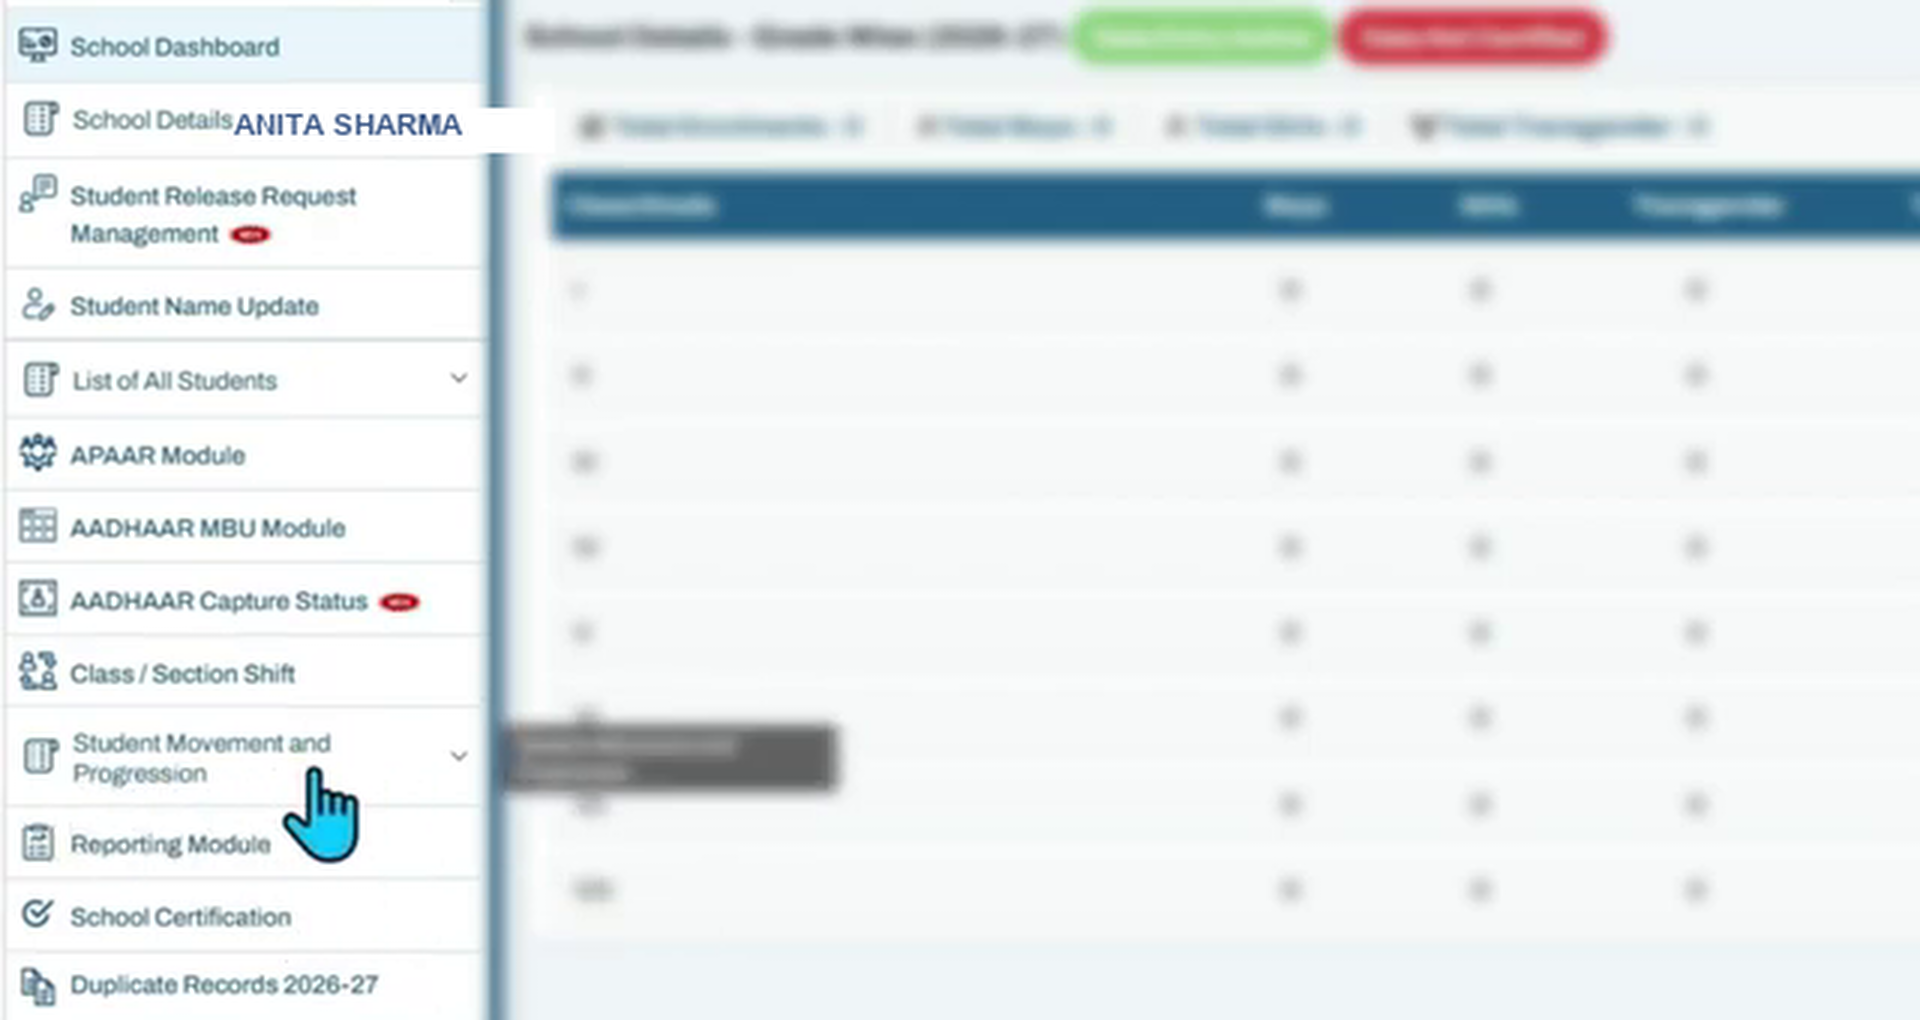
Once inside the school console, look at the vertical menu bar on the left side of the screen. Locate and click on the menu option named "Student Movement & Progression". The menu expands to reveal sub-navigation links. Select "Progression Activity" from the submenu list.
Step 5: Launching the Import Module (Within State)
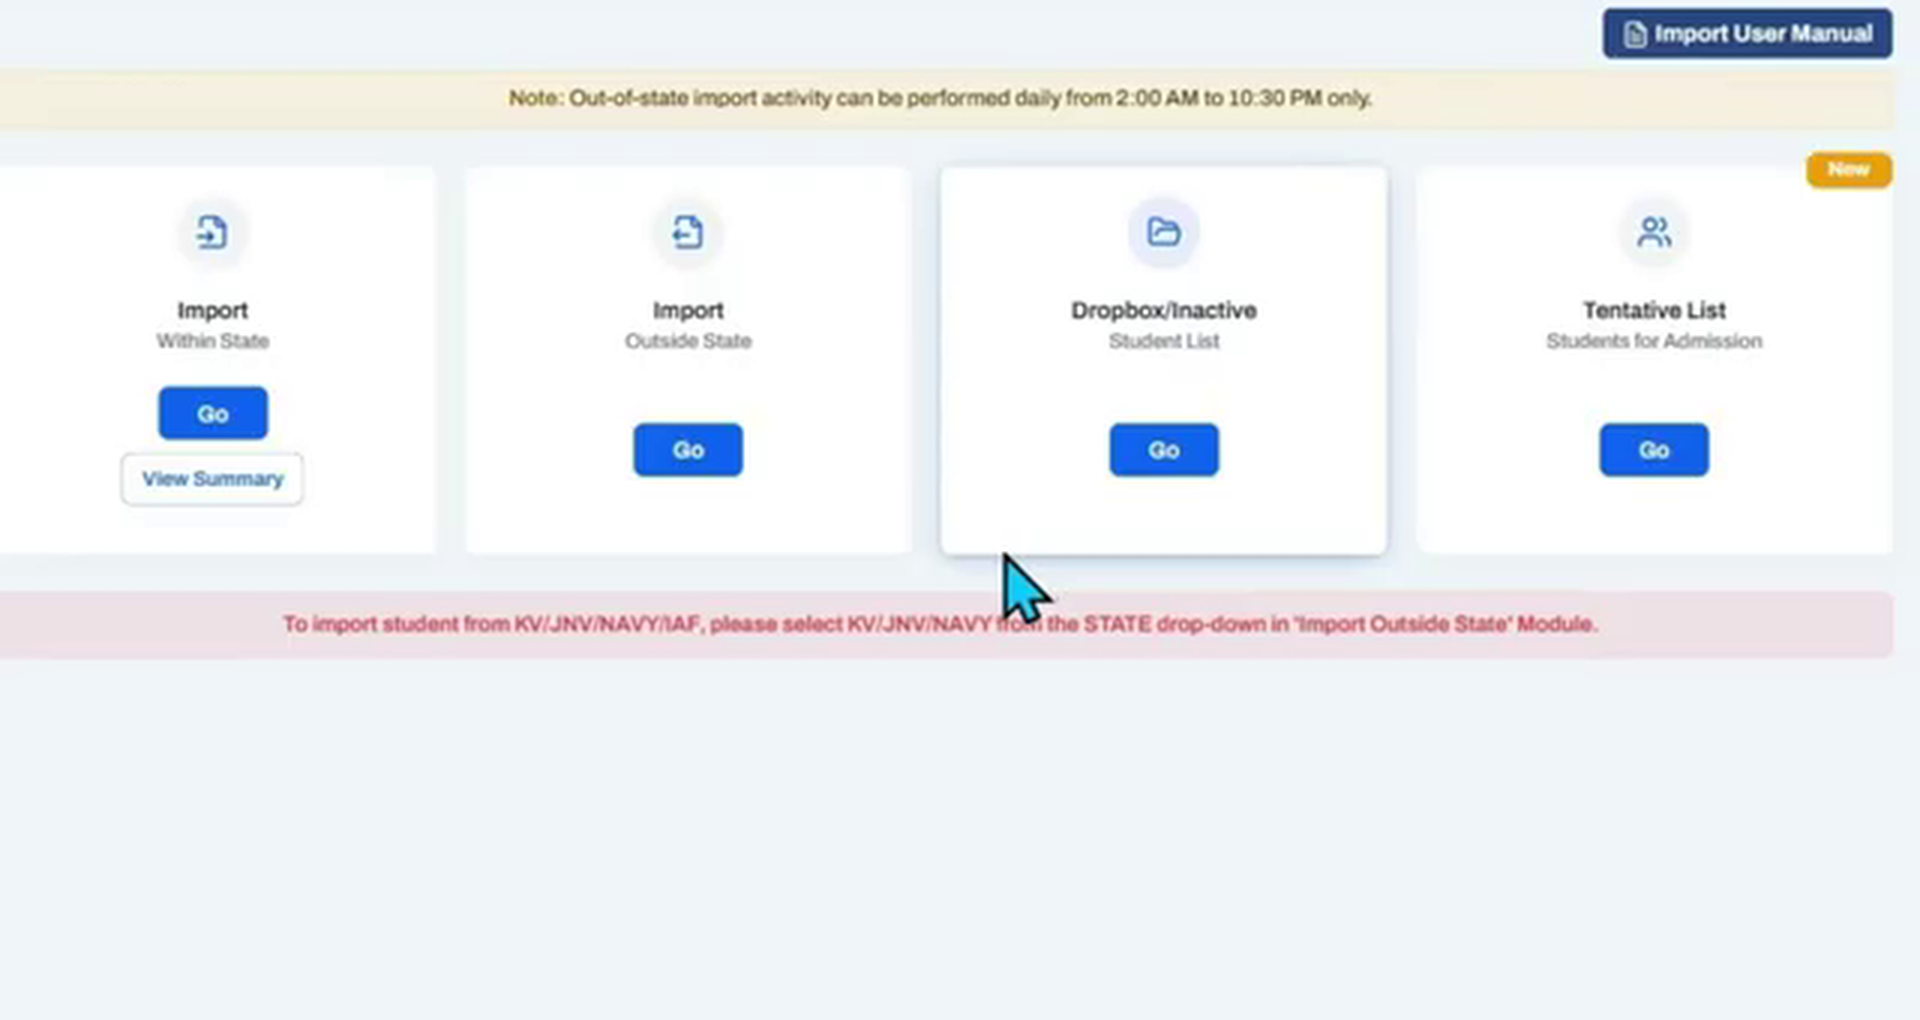
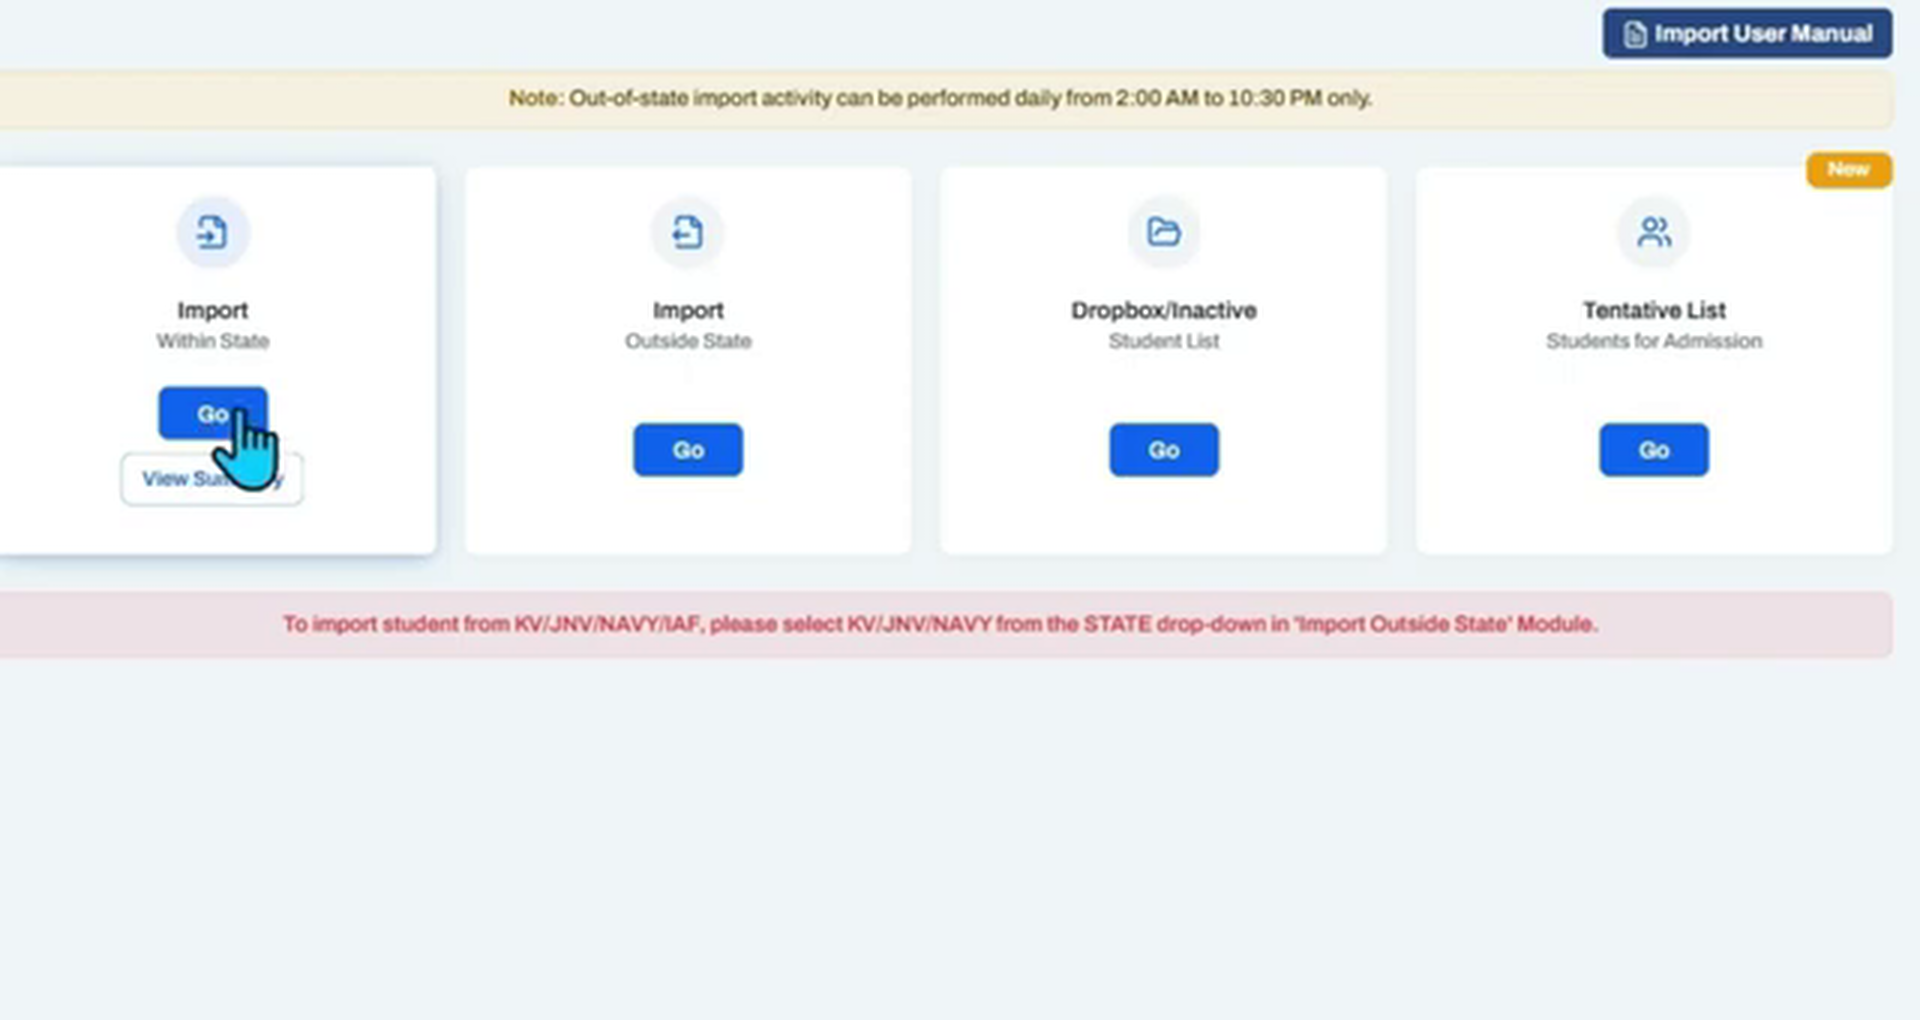
The progression landing page displays three options: Progression Module, Import Module, and Dropbox list. Under the "Import Module" block, you will see two categories: "Import Within State" and "Import Outside State".
Note that for "Import Outside State", the portal enforces strict time limits: it is only active daily from 2:00 AM to 10:30 PM. To import a student from within your state, click the "Go" button under the "Import Within State" card.
Step 6: Accessing the Search by PEN Utility (Aadhaar & YOB)
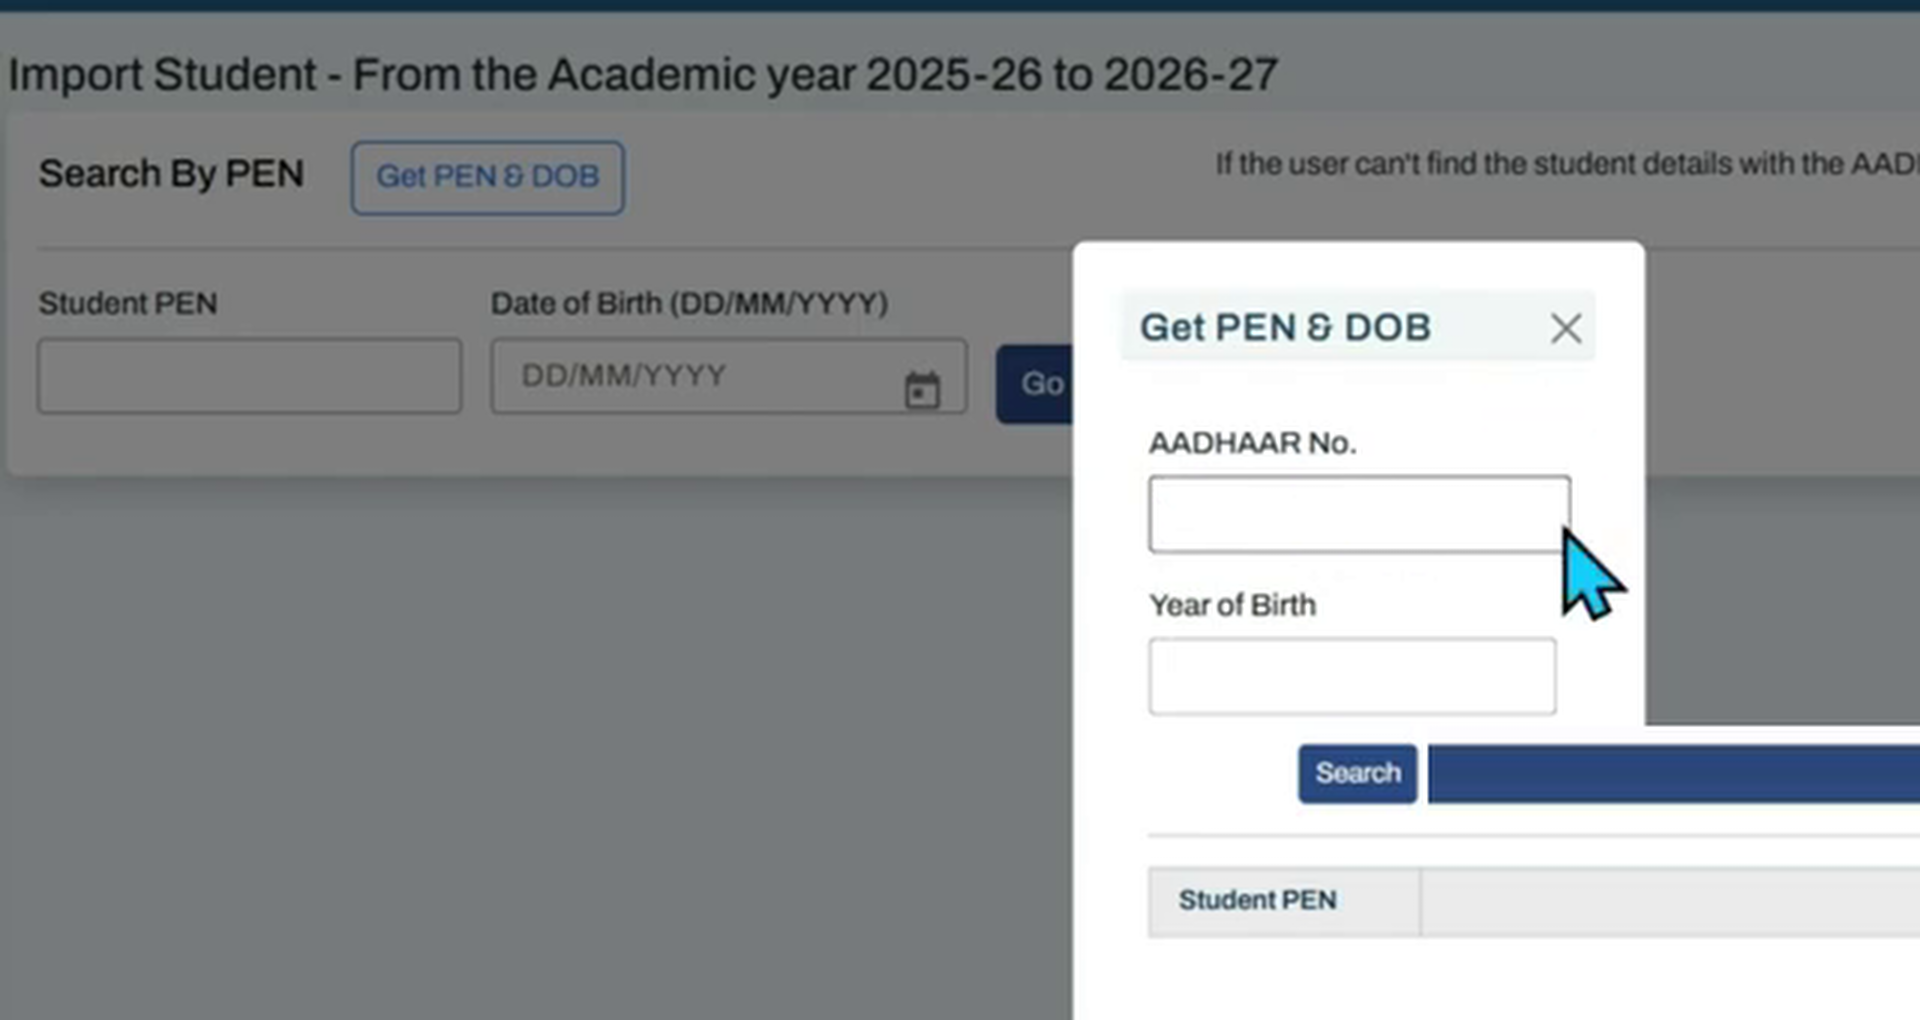
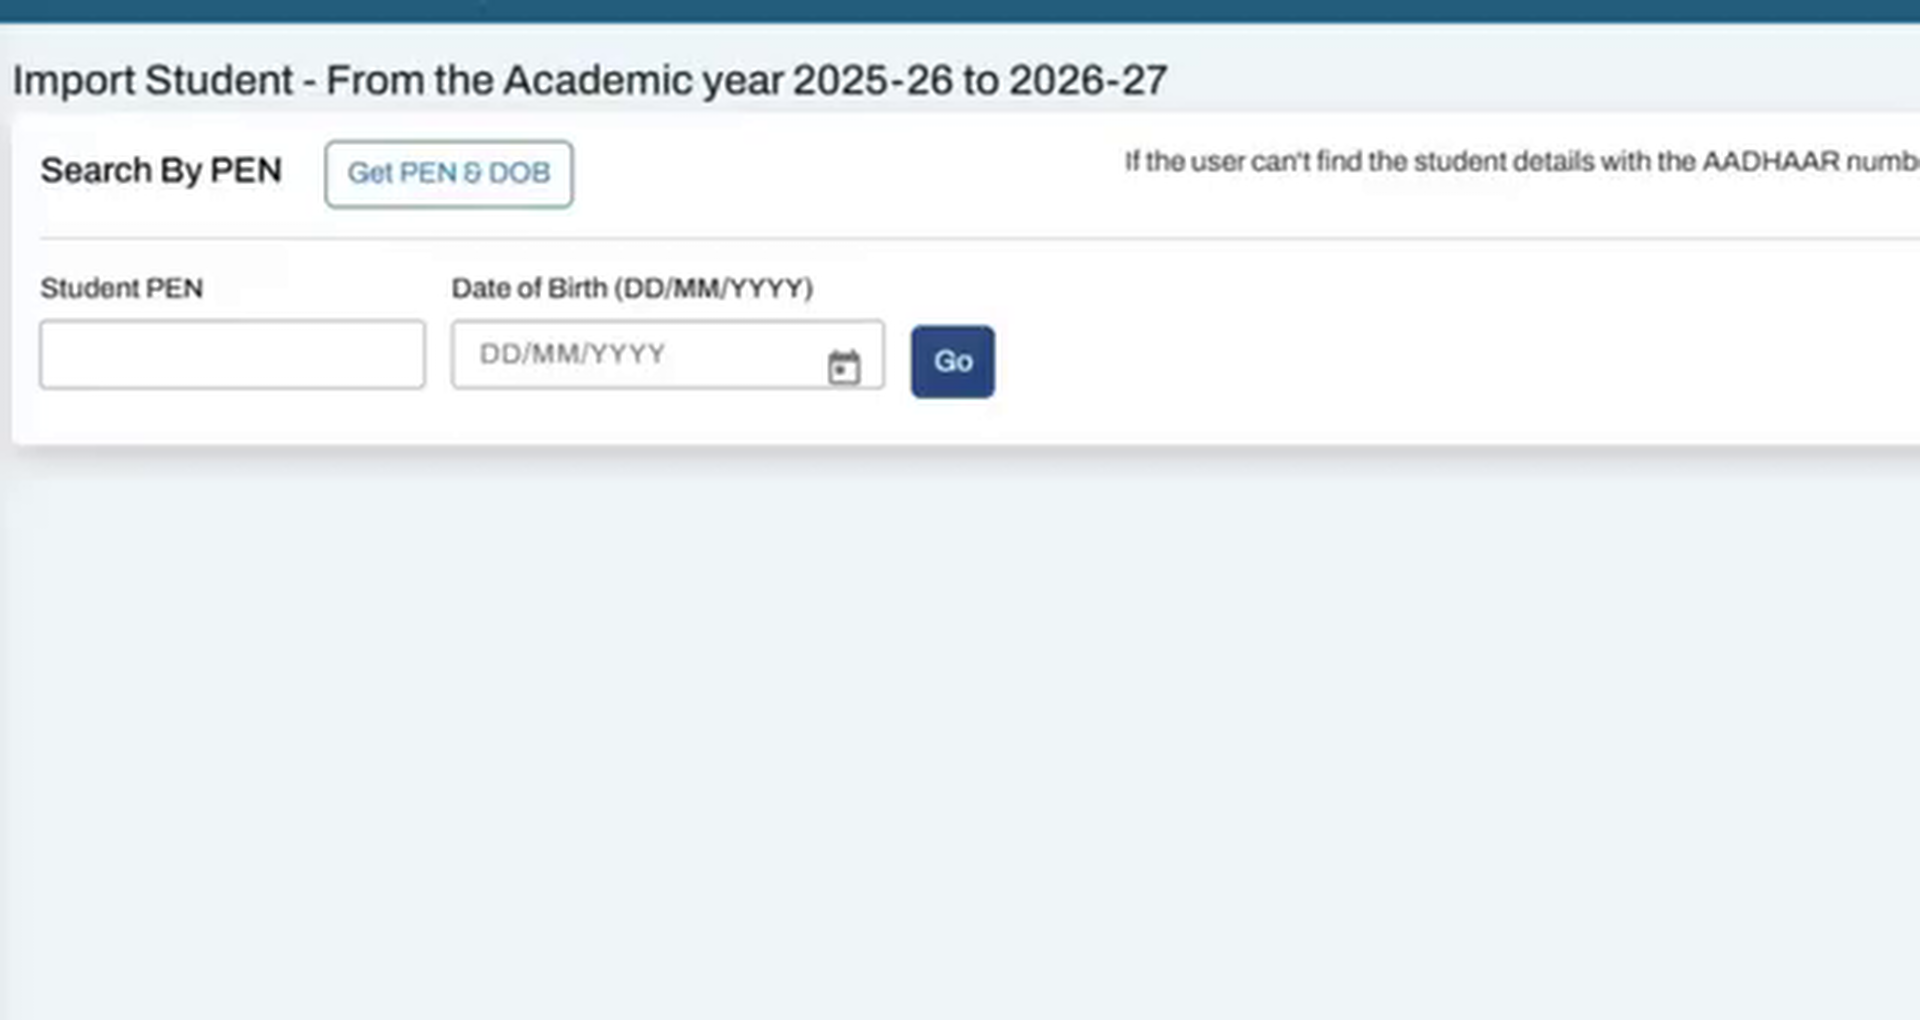
If you do not have the student's PEN, look for the link labeled "Search by PEN" near the entry fields. Click this link to open a modal popup.
Inside the popup, enter the student's 12-digit Aadhaar Number and their Year of Birth (YOB) matching the Aadhaar card. Click search, and the system retrieves the student's PEN and Date of Birth as stored in the UDISE registry. Copy these details for the next step.
Step 7: Entering Student PEN and Date of Birth
Close the popup and return to the main form. Enter the retrieved 11-digit Student PEN and the matching Date of Birth (DOB). Ensure the DOB is entered exactly as shown on the portal. Click the "Go" button next to the input fields.
Step 8: Verifying Student Dropbox Status (Active for Import)
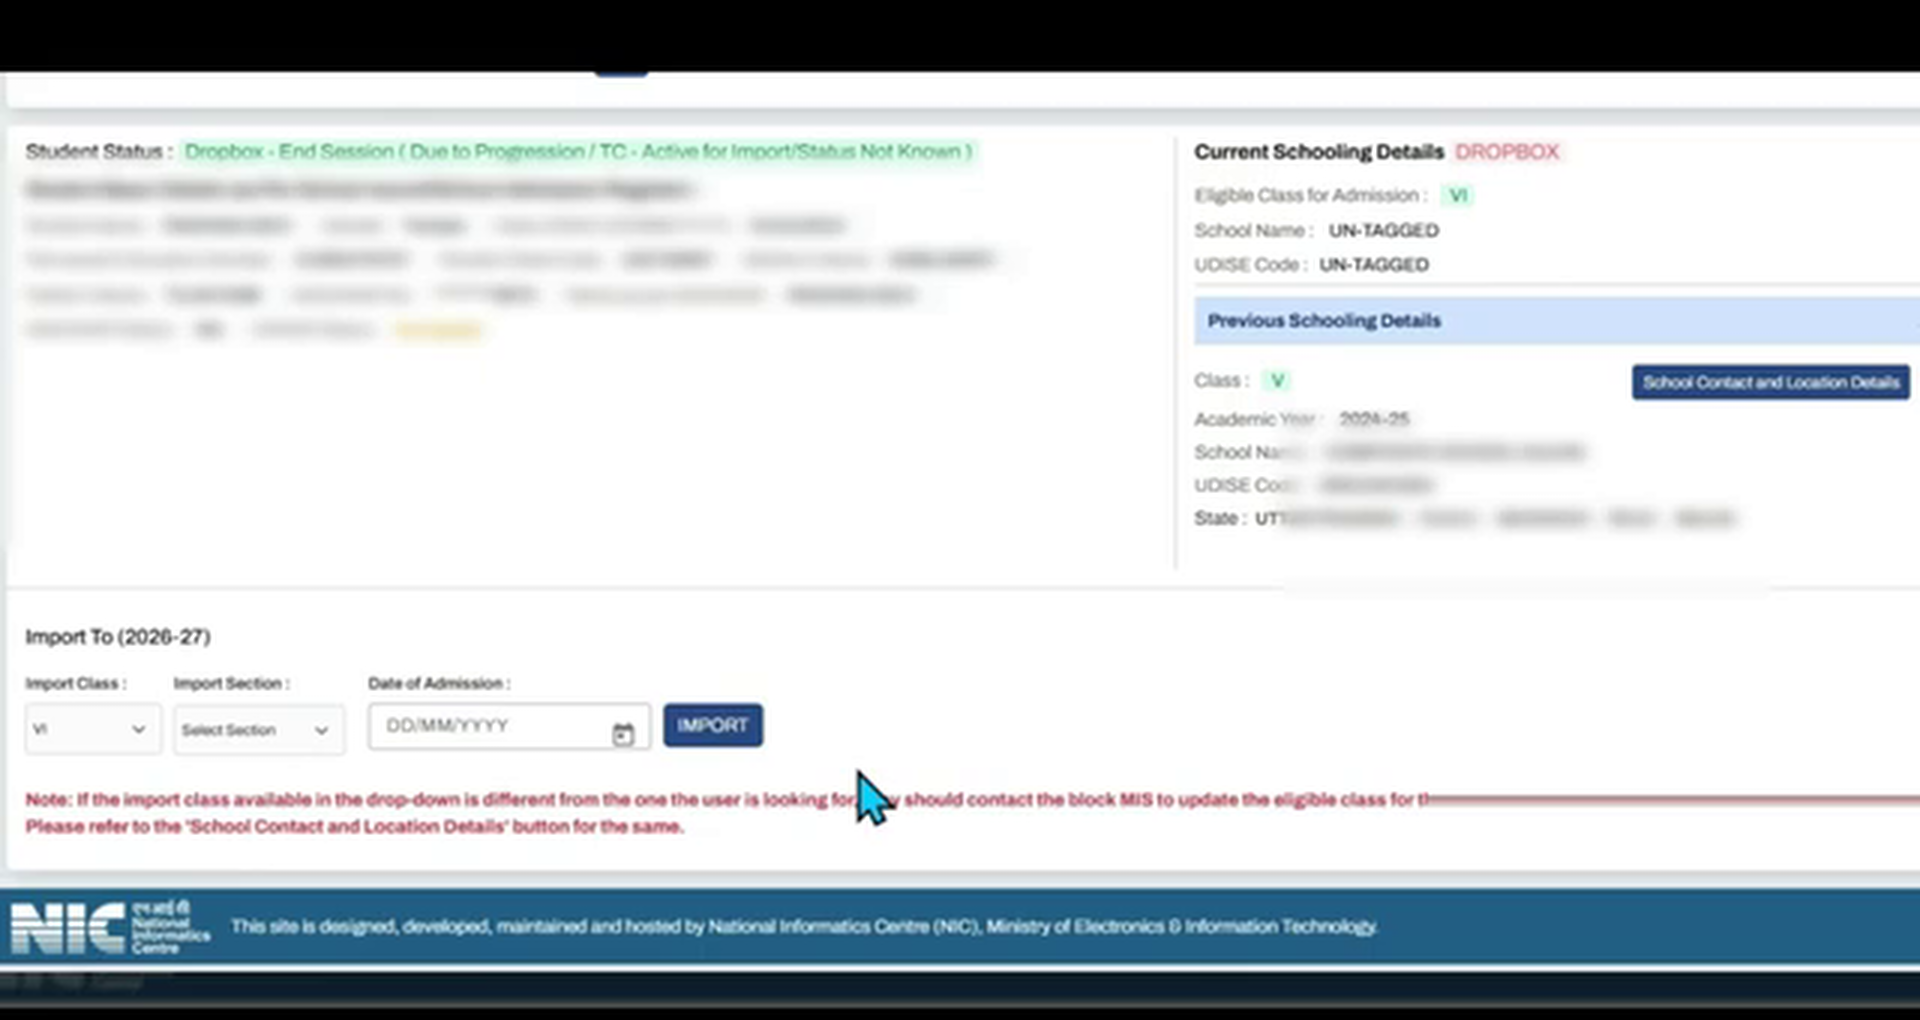
The system retrieves the student profile. The top of the page displays the **Student Status**. Look for a green indicator stating "Active for Import" under the Dropbox details. This confirms the previous school has completed their progression and released them into the Dropbox. The page also lists the student's name, previous class details, previous school name, and UDISE code.
Step 9: Entering Import Admission Details (Class, Section, Date)
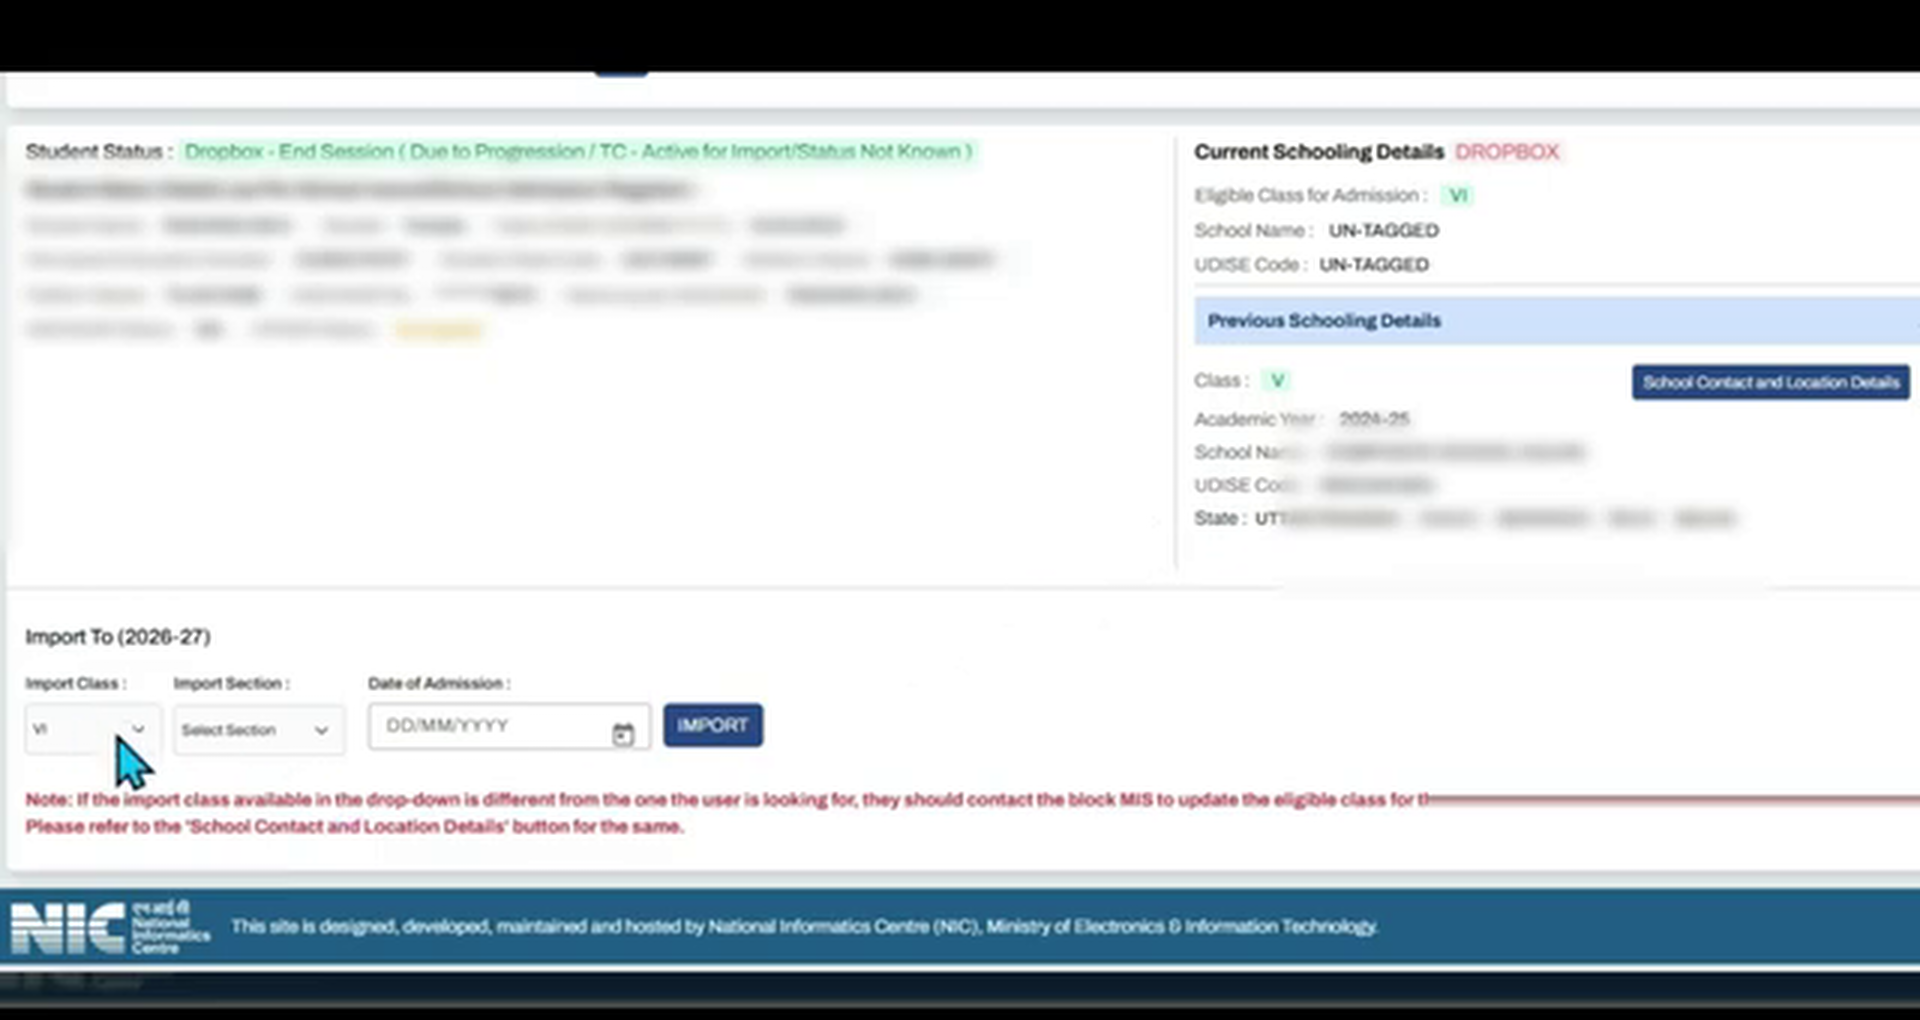
Scroll down to the "Import To 2026-27" section. Fill in the enrollment details for the student in your school:
- Import Class: Select the class they are taking admission in (the dropdown displays eligible classes based on their age and progression limits, such as Class 6, 7, or 8).
- Section: Allocate the class section (e.g., Section A).
- Date of Admission: Select the official date the student took admission in your school.
After verifying the details, click the blue "Import" button.
Step 10: Confirming and Executing the Student Import
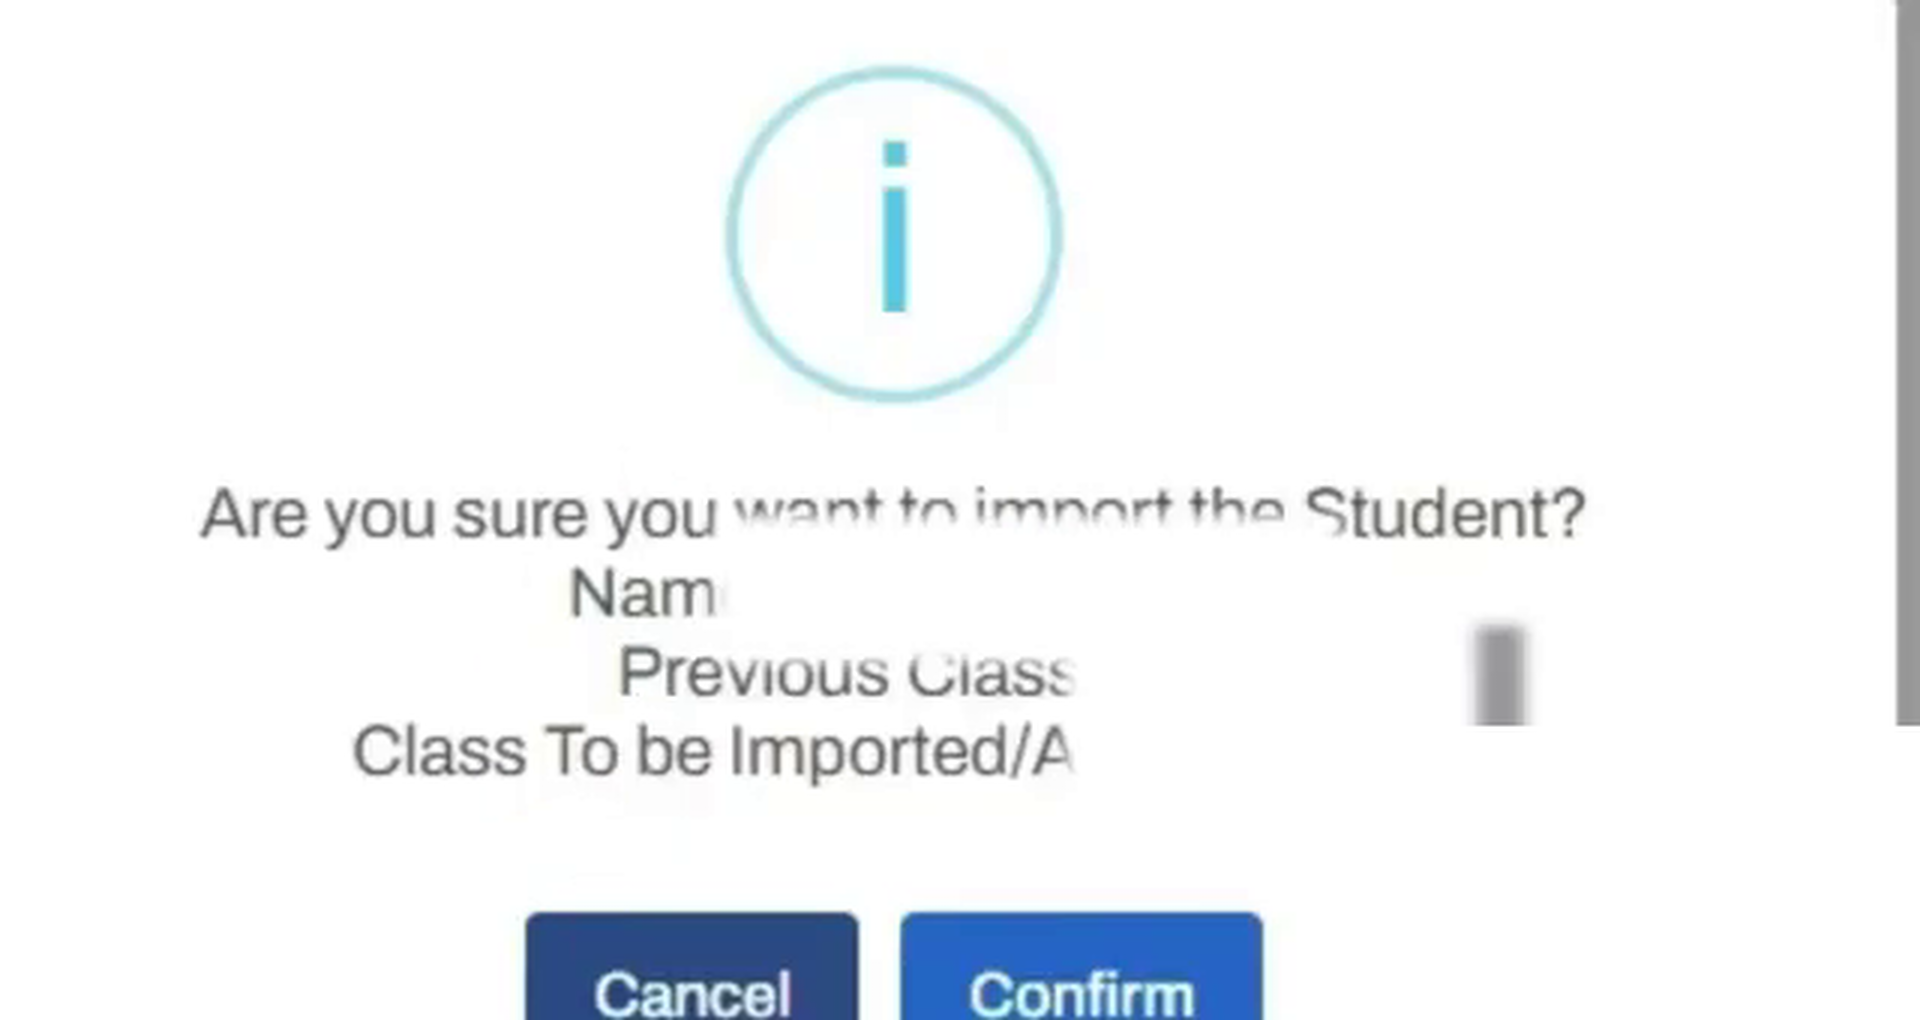
A confirmation dialog box will pop up on the screen, asking: "Are you sure you want to import this student?". It displays the student's name, previous class, and the class they are being imported into. Double-check this summary. If everything is correct, click the "Confirm" button to execute the import.
Troubleshooting Session Mismatch Errors & Inactive Dropbox Status
During the import process, you may encounter system blockages. Below are the two most common errors and how to resolve them:
1. Session Mismatch Error (Old Session Import)
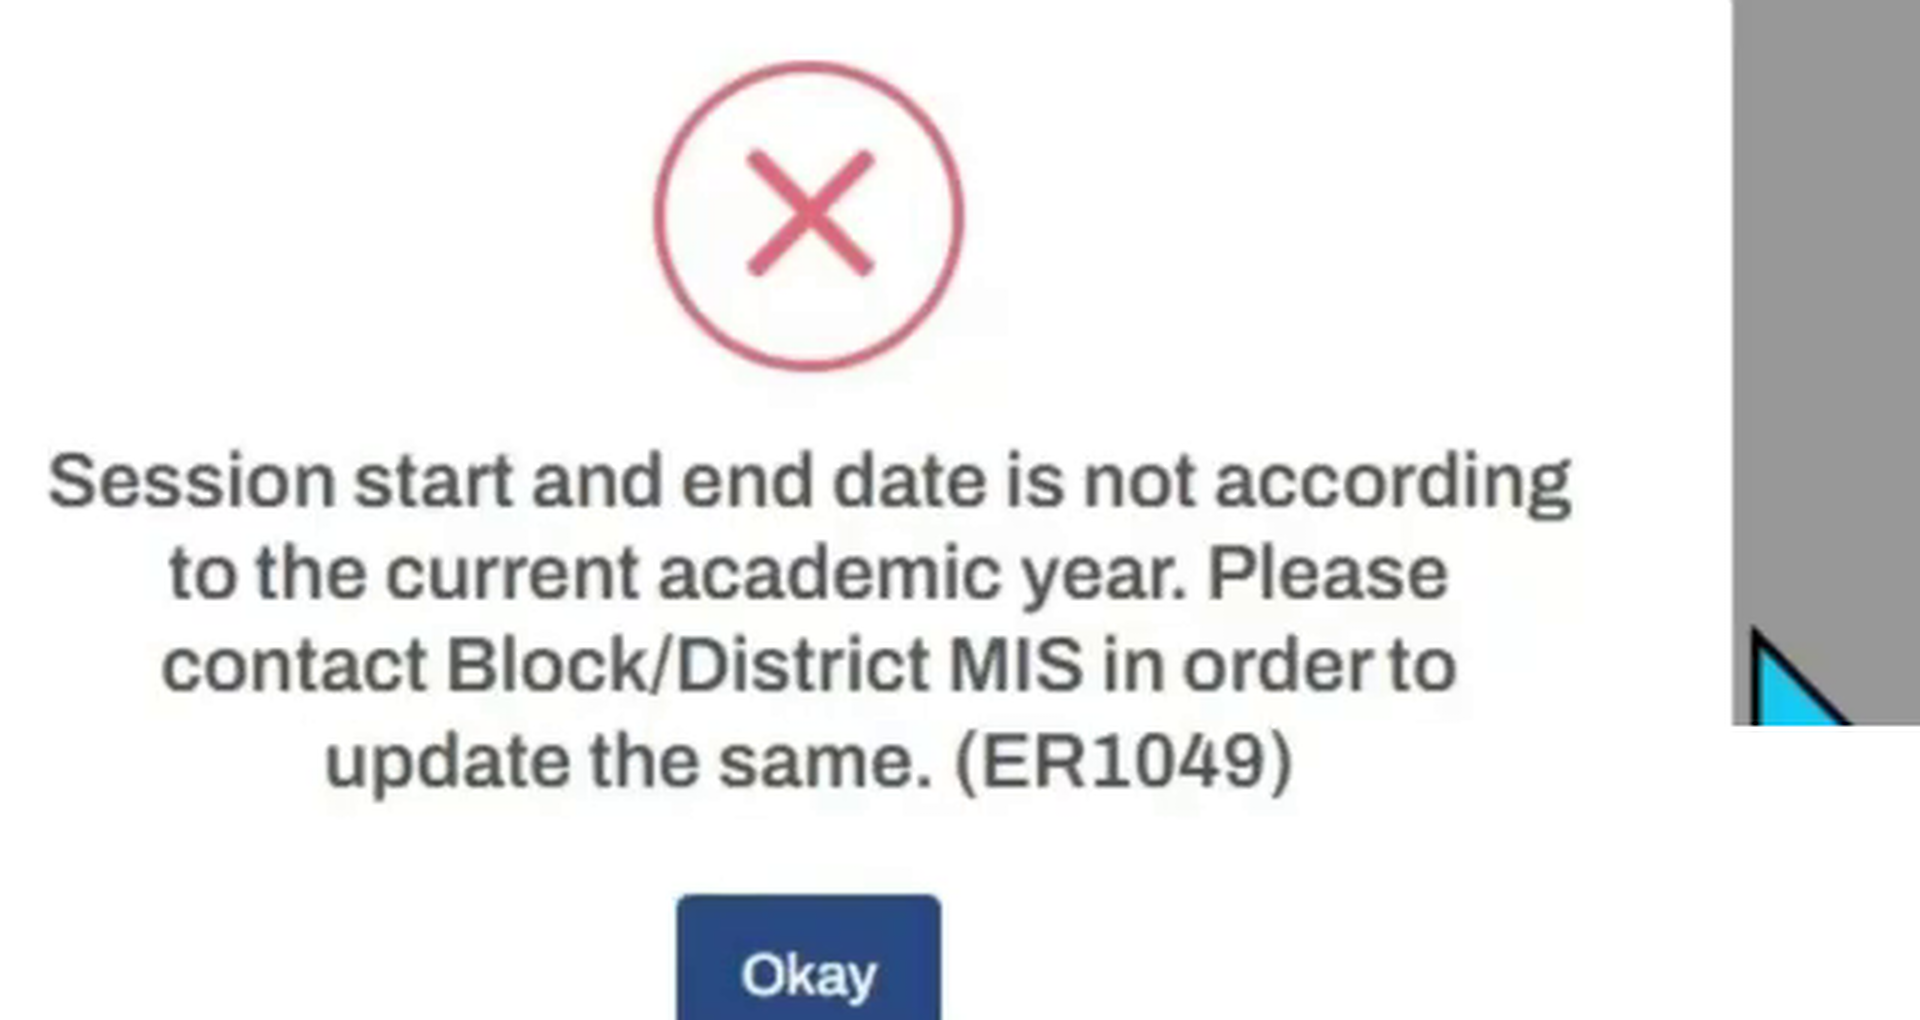
If you click "Confirm" and receive an error message (like the one shown in Figure 12), it means the student's record belongs to an older session (e.g. 2024-25 or earlier) instead of the immediate previous session (2025-26). The portal only allows direct imports for active students from the last session. For gap-year students or older records, you cannot complete the import online. You must contact your Block MIS Coordinator or District MIS office. Submit a physical application with school admission registers, and they will import the student using admin credentials.
2. Dropbox Status "Inactive" (Red Color)
If the student profile displays a red "Inactive" status instead of green, the student is still active in their previous school's registry. You cannot import them. Contact the previous school administrator and ask them to complete the student's progression and set their schooling status to "Left School with TC/Without TC". Once they update the record, the student is automatically released to the Dropbox and their status changes to "Active for Import" (Green).
Summary Checklist for School Administrators
Use this table as a quick reference checklist to resolve student import statuses:
| Dropbox Status | System Action Allowed | Correct Administrative Action |
|---|---|---|
| Active for Import (Green) | Direct Online Import Allowed | Proceed to select Class, Section, Admission Date, and execute import. |
| Inactive (Red) | Import Blocked | Request previous school to release the student from their registry. |
| Session Mismatch Error | Online Import Blocked | Submit school registers to BRC/District MIS to import via admin console. |
| PEN Not Found | Search Blocked | Use "Search by PEN" with Aadhaar and YOB, or check spelling on the previous TC. |
Udise Plus Student (SDMS) Login Module (State Wise)
❓ Frequently Asked Questions (FAQs)
Here are the most common questions people ask about UDISE Plus Individual Student Import 2026-27: Step-by-Step Guide with Screenshots.
✅ Conclusion
Importing transfer students individually in the UDISE Plus Student Module (SDMS) 2026-27 is a straightforward process once you have the student's Permanent Education Number (PEN) and matching Date of Birth. Reconciling records beforehand and verifying that the previous school has correctly released the student into the Dropbox prevents common system blockages and BRC rejections. Keep in mind the strict daily time limits for out-of-state imports and the immediate previous session rule to ensure a seamless data entry experience.